Working with Array Dimensions and Elements
Use the following procedures to create, edit, and delete array dimensions and elements.
Note: For information on how to assign dimensions to existing variables and how to define values/equations for array elements, see Creating Arrayed Variables.
To Create Array Dimensions and Elements
-
From the Interface, Model, or Equation menu, choose Array Editor.
The Array Editor will open.
-
To create a new dimension, click the  button below the "Array dimensions" list.
A new row will appear in the "Array Dimensions" list.
-
In the name column, type a name for the new dimension.
Note: You can also add a new dimension and its label elements by copying and pasting them from a spreadsheet, comma-separated list, or tab-separated list. For more information, see To Create a Dimension by Importing Label Elements.
-
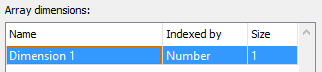
In the Indexed By column, select the type of dimension you're creating: Number or Label.
-
In the "Size" column, select the number of elements you want to create for the dimension.
-
Type the name for each element in the "Dimension element labels" list.
Note: You can also paste label elements from a spreadsheet, comma-separated list, or tab-separated list. For more information, see To Paste Copied Label Elements.
- To create another dimension and its elements, repeat steps 2 – 6.
- When you're finished creating dimensions and elements, click OK.
Now you can assign the dimension to variables in your model.
To edit a dimension or its elements, or to delete dimensions or elements, see To Edit Array Dimensions and Elements, next.
To Edit Array Dimensions and Elements
Use the following procedures to edit dimensions and elements in the Array Editor.
Notes: Plan your dimensions and elements carefully before you assign them to variables. Changes you make to dimensions and elements apply to all variables the dimensions are assigned to.
When you add new element labels to a dimension that's assigned to one or more variables, we recommend that you add the labels to the end of the list of labels rather than inserting them between existing labels.
- Open the Array Editor.
- Make the changes you want to the dimensions and elements:
- To delete a dimension, select the dimension in the "Array dimensions" list and then click the
 button under the "Array dimensions" list. When you delete a dimension, all elements for that dimension are also deleted.
- To change a dimension's type, select Label or Number in the "Indexed By" column for the dimension.
- To change the number of elements for a Number dimension, change the number of elements in the dimension's "Size" column.
- To edit the elements for a Label dimension, first select the dimension in the "Array dimensions" list, then use one of the following procedures:
- To change the order of the elements for a Label dimension, select the element that you want to move up or down in the "Dimension element labels" list, and then click the
 or
or  button.
- To edit an element's name, select the element and then edit the existing name or type a new name
- To delete an element, select the element and then click the button under the "Dimension element labels" list.
- To create more elements for a Label dimension, either change the number of elements in the dimension's "Size" column, or click the button under the "Dimension element labels" column.
- To insert a new element between two existing ones, select the element you want to put the new element before, then click the button. The new element will be added before the selected element.
- When you're finished editing dimensions and elements, click OK.
To Create a Dimension by Importing Label Elements
Use the following procedure to create a dimension and its label elements by copying a list of label elements from a spreadsheet, comma-separated list, or tab-separated list.
- In the file that contains the label elements that you want to use to create a dimension, select the elements and copy them to the clipboard by using the application's Copycommand (or Ctrl+C/⌘+C).
- Open the Array Editor.
-
In the Array Editor, click the  button under the "Array dimensions" list.
A new dimension will appear with a default name in the "Array dimensions" list, and the copied label elements will appear in the "Dimension element labels" list.
- Edit the default dimension name. You can edit the dimension, its type, its size, and its label elements as you would any other dimension.
To Paste Copied Label Elements
Use the following procedure to copy a list of label elements from a spreadsheet, comma-separated list, or tab-separated list.
- In the file that contains the label elements you want to paste, select the elements and copy them to the clipboard by using the application's Copy command (or Ctrl+C/⌘+C).
- Open the Array Editor.
- In the Array Editor, select the dimension you want to paste elements into.
-
Select where in the list of element labels you want to paste the new elements:
To overwrite existing labels with the pasted labels, click to highlight any element lines that you want to overwrite. You can use Ctrl-click (Windows)/⌘-click (Macintosh) to select separate element labels, or use Shift-click to select a range of element labels.
To insert the pasted labels into an existing list of labels, select the label that you want to insert the new labels above.
-
Click the  button, or press Ctrl+V (Windows) or ⌘-V (Macintosh). The copied elements will appear in the list of elements.
Notes: Each element label must be unique. If you paste element labels that have the same names as existing ones, the software pastes the new labels, but gives them the next sequential default element names ("Element 1", "Element 2", etc.).
If you overwrite existing labels and select fewer labels than you paste, the software overwrites the selected labels, then adds any remaining pasted labels to the list without deleting additional labels.
 See Also
