Use an options group to group related variables together, so that the user can choose between them when looking at your model. An options group will have at least two variables, but can have as many as are in your model.
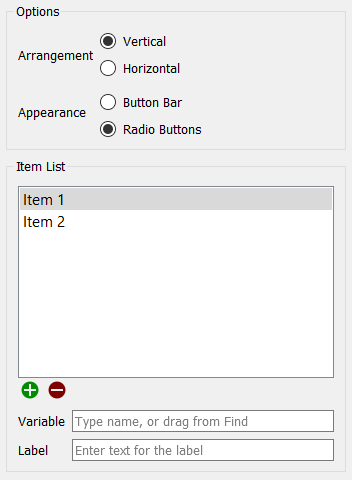
Arrangement specifies the direction the buttons are laid out in. Vertical will stack them on top of each other. Horizontal will lay them out in a row.
Appearance specifies the type of button displayed. Button Bar indicates buttons that are shaped like boxes, with the labels displayed inside them. Radio Buttons indicates small round buttons, with the labels displayed next to them.
Variable specifies what variables will be included in the options group. Variables can be added by clicking Item 1 or Item 2 or ![]() , and choosing a variable from the list provided. After the first two, more variables can be added by using the
, and choosing a variable from the list provided. After the first two, more variables can be added by using the ![]() button, and variables can be removed by using the
button, and variables can be removed by using the ![]() button.
button.
Label specifies what text will be displayed on or next to the button for that variable.