Use a switch to adjust the input values in your model by turning it on or off.
You can control the size and color of the switch, as well as when it resets. Switches can be used with any model variables, but will require activation via the override button (![]() ) for variables that aren't constants.
) for variables that aren't constants.
For more information about placing and editing switches, see Working with Objects.
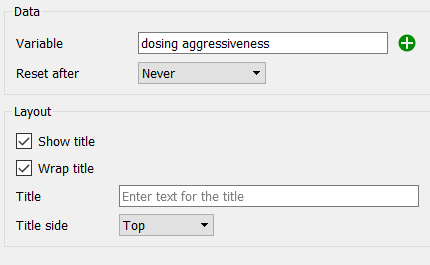
Variable specifies the variable the switch will control. Begin typing and autocomplete suggestions will appear, or click on the ![]() , then select the variable you want from the find dialog that appears.
, then select the variable you want from the find dialog that appears.
Reset After specifies the time after which the variable will revert to the initial value. If this is Never (the default), the value won't reset.
Show title, if checked, specifies that text should be displayed with the switch.
Wraptitle, if checked, will wrap the title text to better fit the available space.
Title specifies what text will be displayed if the "Show title" checkbox is checked. If blank, the variable name will be used.
Title side specifies which side of the switch the text should be displayed on. This only matters if the check box for "Show title" is checked.