Animation Tutorial
Animations allow you to bring your model to life as it simulates. They're created using scalable vector graphics (SVG) files that can have position, size, rotation, and color changes applied to them.
There are a wide variety of SVG files available, and it's also easy to create and edit them. In this tutorial, we'll use a free web based SVG editor to create an SVG file, then use that to create an animation object in Stella Architect.
The animation we'll create is simple and whimsical, involving two smiley faces that we'll color, zoom, and spin, but it illustrates the basic mechanics for creating animations.
Create an SVG Document
Animations are based on SVG documents (images), and these can be created using a number of different tools, with Adobe Illustrator and Inkscape being two of the best known.
You can create SVG documents any way you want, but for this tutorial, we'll use a powerful, free, open-source, web-based product called SVG-Edit.
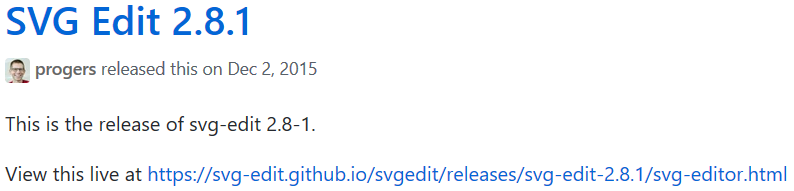
- Go to https://github.com/SVG-Edit/svgedit/releases and click on the "View this live link" for the current version (2.8.1 in the image below).
-
Click on the SVG edit button ( ) in the upper left, and select Document Properties. This will display the document size; be sure it's 640 x 480 (by default, it should be). Since SVG documents are scalable, this size doesn't determine appearance, but rather sets the local coordinates for manipulating the image. 0,0 is the upper left hand corner of the image, and 640,480 the lower right hand corner.
Note: The size settings establish a coordinate system, and Stella will use that coordinate system when you embed the document to animate it. Therefore, we picked a size that matches what you'll want in the interface you're developing.
- On the left hand side, there's a toolbar, with an icon for the shape library (
 ). Click on this, and select the smiley face (
 ). When you do this, the shape library icon will change to
  .
.
- On the blank canvas, press the mouse button down, and then drag to add the smiley face. As you drag, the size of the face will follow your mouse. Release the mouse and you should have a selected smiley face (
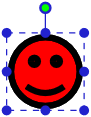 ).
).
- You can change the fill color (currently red) by clicking on the Change Fill Color button (
 ) in the bottom toolbar, and selecting another (say, yellow).
- We can set an ID to make this face easier to identify when we're working in Stella. To do this, go to the ID box in the top toolbar (
 ), and type in faceA, then type the Tab key, and type face to specify the class. After that, press enter to make sure that your changes stick. To double check the ID and class, click on a blank part of the canvas to deselect the object, then click on the face again. Now, in Stella, we can use #faceA to identify this smiley face.
- Repeat the smiley face creation process for a second face, and give it the ID faceB, but also give it the class face.
- Press the black arrow button (
 ) in the upper left corner. Then you can move the faces around by dragging them, or resize them by clicking on them and dragging the handles.
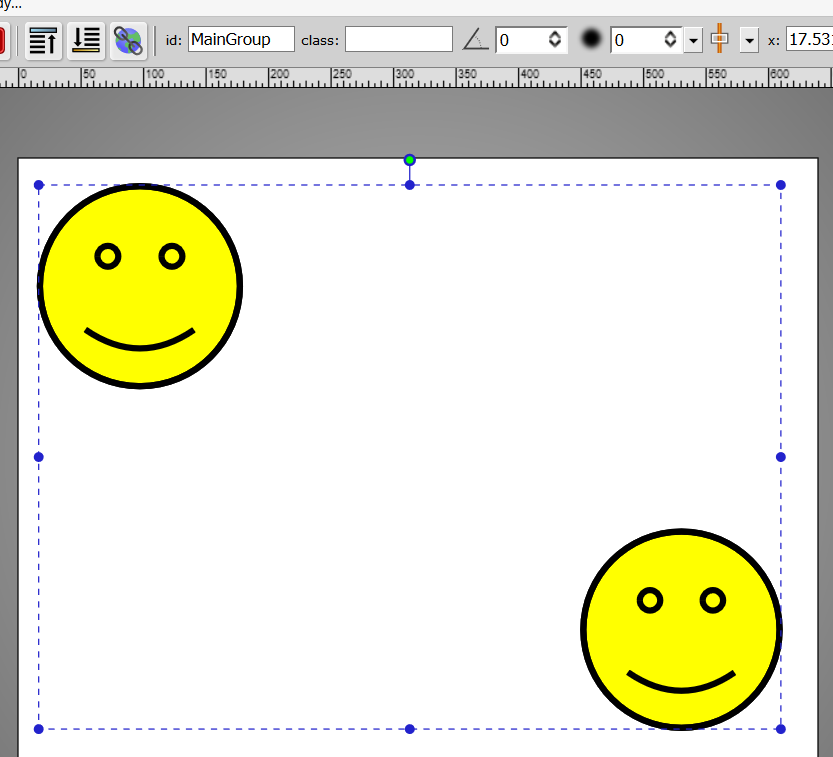
- Group the two images by selecting them (click on one, then Shift+Click on the second) and either hitting the G key, or right clicking and selecting the Group menu item. When you group them, the place to enter the ID will appear in the toolbar. Type MainGroup for the ID (and press the Enter key). You should have something like:
- Now save your work to a file by pressing the SVG Edit button () and selecting SaveImage. A new tab or window will open with the image. From the browser menu, select save (Ctrl+S will probably work as well), and save the image to a file. Be sure the file has extension .svg.
You have now created a document that can be used by Stella for performing animation. As can be seen from this simple example, SVG documents can be quite complex and include a number of embedded images, characteristics of those images, and relationships among them. The key things used in this example are the IDs, to identify specific components; the style, to change attributes of components; and the group, to manipulate multiple components together.
Creating an Animation using an SVG Document
We start with the svg document created above, and a simple model containing only 3 variables:
color = TIME
rotate = SINWAVE(180, 2*(STOPTIME - STARTTIME))
scale = GRAPH(TIME)
(1.00, 1.000), (2.00, 1.000), (3.00, 1.000), (4.00, 1.000), (5.00, 0.800), (6.00, 0.600), (7.00, 0.400), (8.00, 0.600), (9.00, 0.800), (10.00, 1.000), (11.00, 1.200), (12.00, 1.400), (13.00, 2.000)
You can build this model yourself (running from time 1 to 13 by 1/4), or open it from the isee Exchange.
-
Open Designer
If you have Stella Designer, start it, then download and open the model to view it (you won't be able to build the model using Stella Designer). If you have Stella Architect, and are in the model window, go to the interface window (select Open Designer from the Window menu, or click on  in the Mode toolbar).
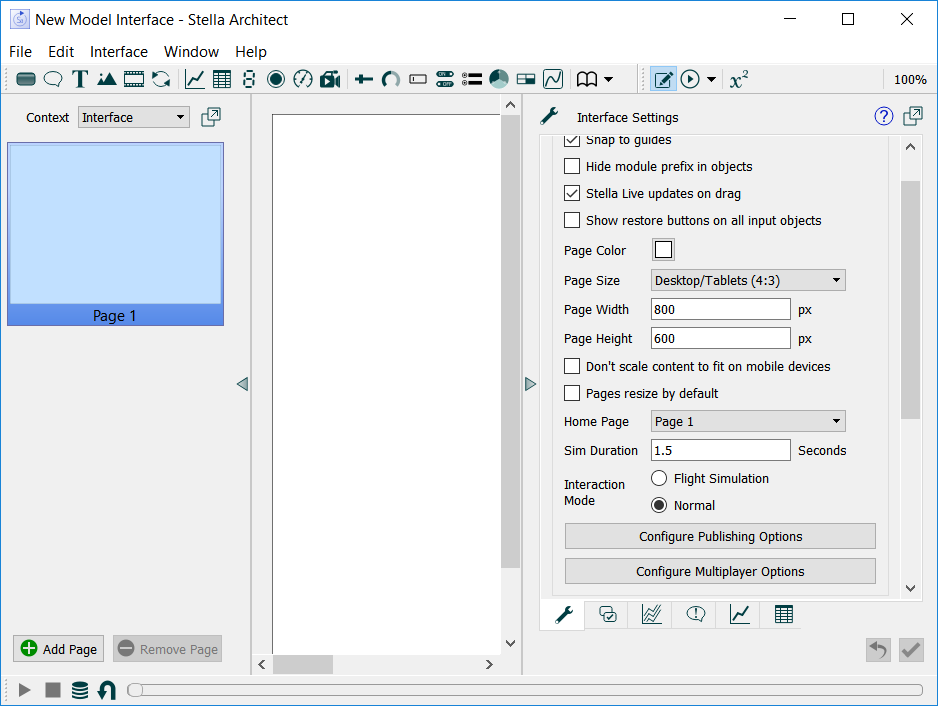
You should see an empty page, with an empty thumbnail to the left:
-
Put down an animation object
Click on the animation object icon ( ) in the interface build toolbar, and drop it on the canvas. You can leave it at the default size.
In the Animation Object(Interface), click on the Browse button at the top, and select the file you saved. When you do this, the content of the file will display inside your animation object on the interface. Resize the object by dragging on the handles so that both smiley faces are visible.
You now have an animation object - the next step is to animate it.
-
Create a color Scheme
Color schemes create an association between colors and values, and can be applied to different parts of our SVG document. To create one, go to color schemes at the top of the panel:
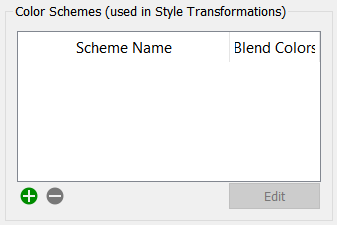
Click on the  to add a new scheme, and the Color Scheme dialog will open.
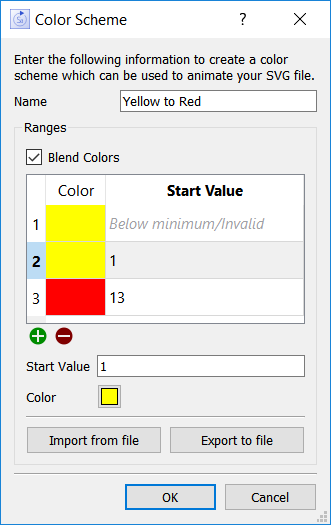
Fill it in as shown, starting from yellow and getting to red at 13, with blend colors checked. We repeat yellow for both the minimum and 1 because color blending can only occur between numeric values. If we didn't want to blend colors, we could have used just two entries.
Click OK.
-
Apply a Style Transformation
Go to the Style Transformation Section on the properties panel:
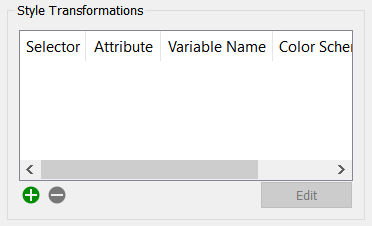
Click on the to add a new transformation, using the Style Transform dialog:
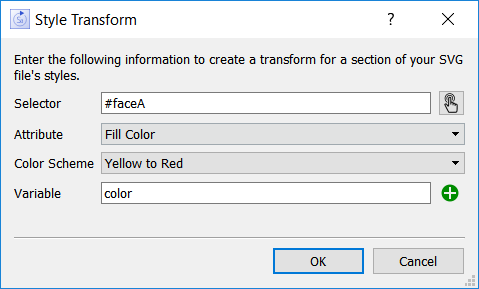
Either type #faceA (recall that faceA was the ID we gave to the first face when we created the SVG document), or click on  to open the SVG Element Selector dialog and click on the upper left face.
In the dropdown for Attribute, select Fill Color - this is what we'll animate. When you do this, the Color Scheme dropdown will appear. This has only a single item, Yellow to Red; select this.
Click on the , to the right of Variable, and select color from the Find window that appears.
Click OK to close the dialog.
Now run the model, and observe what happens to the upper left face as the simulation progresses. It should transition from yellow to red.
-
Change the Size of the Faces
When working with SVG files, changes can be applied to individual components or to multiple components. In this case, we want to apply the changes to both faces. There are two ways to do this. We can specify each of them in a list (#faceA,#faceB), or we can specify their style (.face - recall that we used face for the style, and the . denotes a style will follow).
Go to the movement transformation section:
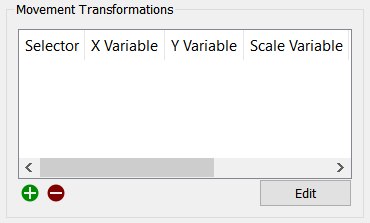
Click on the to add a new transformation using the Movement Transform dialog.
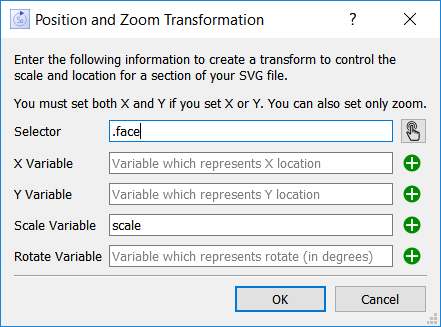
Enter .face for the selector (again the . is to indicate a style, and face to indicate the style name we entered when creating the SVG document).
Leave X Variable, Y Variable, and Rotate Variable blank. Since these are blank, this transform won't reposition or rotate the faces. Typically, you'll likely use only one entry in a transformation, though it's possible to combine them.
Click on the next to Scale Variable, and select scaled from the Find window that appears.
Click on OK.
Now, when you simulate the model, the upper left face will change color, and both faces will change size.
-
Rotate the Faces
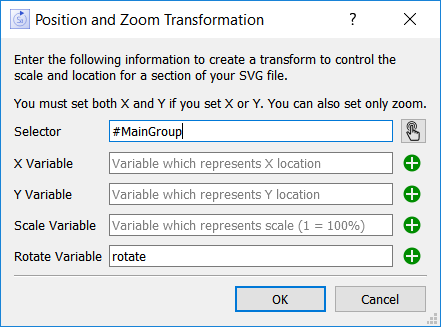
For the rotation, we want to rotate the faces around one another. To do this, we'll use the group we created (we could use .face as we did in the previous step, but this would make each face rotate in place).
Click on the to add a new transformation, using the Movement Transform dialog. This time, leave everything except Rotate blank, and set that value to the variable rotate.
Click on the to add a new transformation, using the Movement Transform dialog.
Click on OK.
Now, when you simulate the model, the faces will change color and size, and also rotate around one another.
-
Experiment
SVG animations allow you to control a variety of aspects of an SVG diagram, and can be used to build up quite sophisticated results. Case color animations will allow you to fill in maps to show conditions.