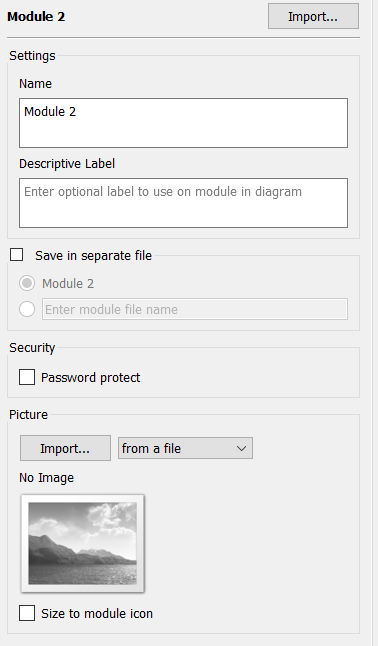
Use the Module Properties tab to set module properties, including the name of the model file (if any) that you imported to provide the module’s contents, whether the module should be saved in a separate file from the model, the picture (if any) that appears on the module icon in the model, and whether the module is password-protected.
To view the Module Properties tab for a module, select that module's icon on the model diagram. For information about using panels, see Using the Properties Panel.
Click this button to import an existing model into the module. The contents of the imported model become the contents of the module. As long as the names of the variables in the module are unchanged, the connections in and out of the module (cross level ghosts) will be retained.
Note Import is not part of the undo/redo system. When you import all undo information will be discarded. It is best to save, then import.
Note Graphs using variables in the module that are in the main model may have those variables removed.
This is the name of the module. If you have not added a description, you can edit the name on the diagram by clicking on it just as with any model variable. If you have added a description, the name can only be changed in the panel. The name must be unique, if you enter a name that already exists you will receive a message and the name will revert to its old value.
This is the label that will be displayed on the model diagram, and in the Module Navigation Panel. This makes it easy to provide a short module name (such as HR) while giving a more descriptive label for the diagram (such as Human Resources). Cross level variables, and variables appearing in graphs and tables will then appear as HR.spending which can make them easier to read.
By default, modules are saved in the model file. To save the module in a separate file (.ITMX), select this check box and then select how you want to name the module file:
Note: All module files are saved as .ITMX files, regardless of whether they're saved with Stella.
When you save a module in a separate file, it's saved in a "Modules" directory within the model file's directory.
Use the options in this section to include a picture as the module's icon.
from the clipboard – Select this option to import the image currently copied to the clipboard. When you select this option, make sure you've first copied a picture to the clipboard, then click the Import button.
Note: For a list of supported image file formats, see Supported graphic file formats.
For best results, put all picture files in a directory entitled "graphics", located in the same directory as the model file.
If there was an existing picture being used as the model's icon, it will be replaced by the new picture you specify.
When you import a picture, it appears in the "Picture" section of the Module Properties tab, as well as on the module icon in the diagram.
To delete the imported picture, click ![]() in the upper right corner of the picture on the Module Properties tab.
in the upper right corner of the picture on the Module Properties tab.
Select the Password protect check box to password-protect the module. When you select this check box, you're prompted to enter a password. Model users will be required to enter the password you specify when they try to access the module, but the module will run when the model runs. This is available only when there is no security set for the root model (see the Model Security dialog box for more discussion).